We are often asked about the installation of the Blackmagic URSA mini Pro 12K and Entaniya Fisheye HAL series.
Information about the possibility of installation.
Installation of Blackmagic URSA mini Pro 12K and Entaniya Fisheye HAL series
OLPF and protrusion at the rear of the lens
Several of the lenses in the Entaniya Fisheye HAL series have the lens protruding further back than the mount.
Therefore, the lens has to be attached by inserting the back part of the lens inside the camera.
When trying to attach the lens to the camera, the rear of the lens may interfere with the OLPF or light-shielding cup inside the camera.
Since different lenses have different sizes, we verified the results with each lens.
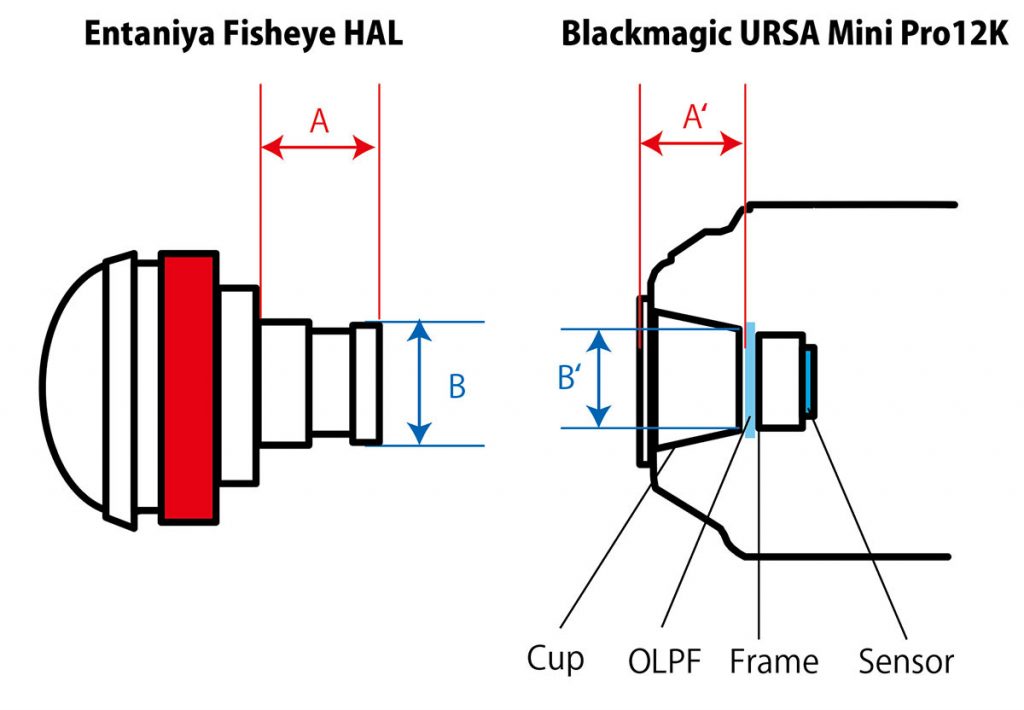
The two sizes will be the key.
Size A
The length of the protrusion from the mount to the back of the lens (A) and from the mount to the OLPF (A’)
If the length of A is longer than A’, the back of the lens will interfere with the OLPF and the lens cannot be installed.
SizeB
Outer diameter of the rear part of the lens (B) and inner diameter of the light-shielding cup inside the camera (B’)
If the length of the lens is longer than B’, the back of the lens will interfere with the light-shielding cup inside the camera and the lens cannot be installed.
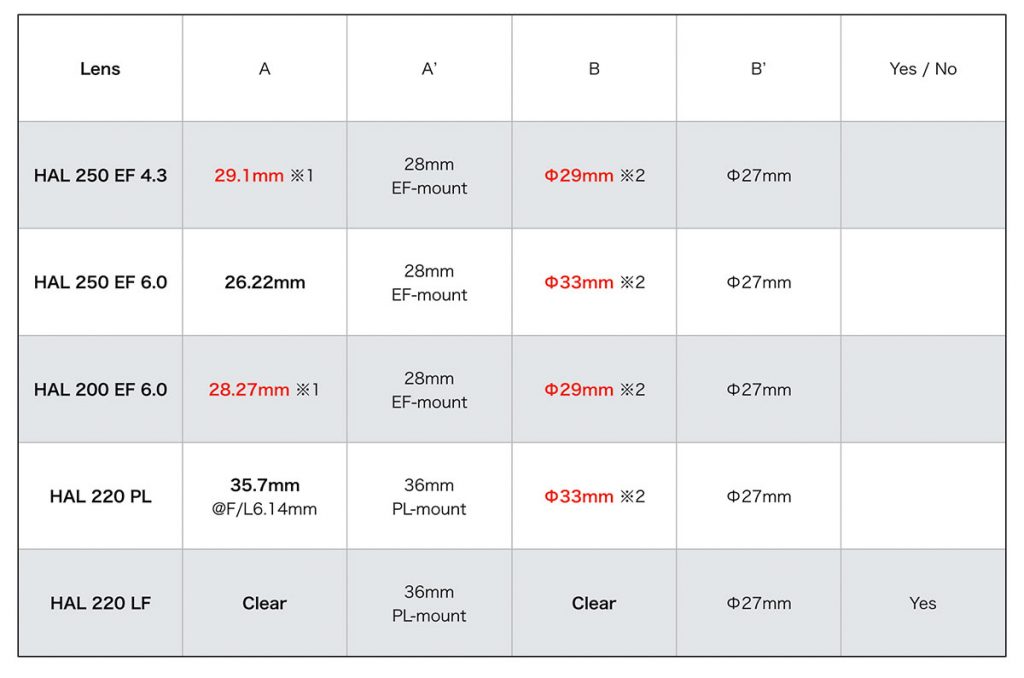
Availability of installation
HAL250 EF 4.3
Since the protrusion behind the lens is 29.1mm, it interferes with the OLPF and cannot be installed.
HAL250 EF 6.0
It cannot be installed, since the outer diameter of the rear part of the lens is larger than the light-shielding cup.
HAL200 EF 6.0
Since the protrusion behind the lens is 28.27mm, it interferes with the OLPF and cannot be installed.
HAL220 PL
The protrusion behind the lens is 35.7mm, so it can be installed.
However, for focal lengths of 7.55 mm or less, use is deprecated due to possible interference between the filter inside the camera and the bottom of the lens.
HAL220 LF
It can be mounted just like a normal lens.